


![Active Directoryのユーザ一覧表を[csvde]コマンドを使用して作成する方法](https://www.netassist.ne.jp/wp-content/uploads/2016/10/4ae2f7239863b7c75aab7b0cf0db07f8-300x218.jpg)
MariaDBインストール
こんにちは、技術部のkinjoです。
今日はMariaDBについて書いてみたいと思います。
MariaDBはMySQLから派生したデータベースです。
MySQLを使用したことがある人ならほとんど同じ感じで使用できると思います。
今回のテストサーバはCentOS7
[root@test ~]# cat /etc/redhat-release
CentOS Linux release 7.2.1511 (Core)
CentOS7だとデフォルトでmariadb5.5系がレポジトリにありますが、
せっかくなので、10系を入れたいと思います。
[root@test ~]# yum list |grep mariadb
mariadb.x86_64 1:5.5.50-1.el7_2 updates
mariadb-bench.x86_64 1:5.5.50-1.el7_2 updates
mariadb-devel.i686 1:5.5.50-1.el7_2 updates
mariadb-devel.x86_64 1:5.5.50-1.el7_2 updates
mariadb-embedded.i686 1:5.5.50-1.el7_2 updates
mariadb-embedded.x86_64 1:5.5.50-1.el7_2 updates
mariadb-embedded-devel.i686 1:5.5.50-1.el7_2 updates
mariadb-embedded-devel.x86_64 1:5.5.50-1.el7_2 updates
mariadb-libs.i686 1:5.5.50-1.el7_2 updates
mariadb-libs.x86_64 1:5.5.50-1.el7_2 updates
mariadb-server.x86_64 1:5.5.50-1.el7_2 updates
mariadb-test.x86_64 1:5.5.50-1.el7_2 updates
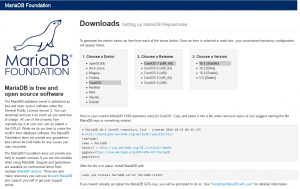
ということでmariadbのレポジトリページへアクセス
https://downloads.mariadb.org/mariadb/repositories/
ディストリビューションとMariaDBのバージョンを指定するとレポジトリの内容を生成してくれます。
あとは、/etc/yum.repos.d 以下に適当な名前でファイル作ってあげれば
[root@test ~]# vi /etc/yum.repos.d/mariadb.repo
================================================
# MariaDB 10.1 CentOS repository list – created 2016-10-14 15:24 UTC
# http://downloads.mariadb.org/mariadb/repositories/
[mariadb]
name = MariaDB
baseurl = http://yum.mariadb.org/10.1/centos7-amd64
gpgkey=https://yum.mariadb.org/RPM-GPG-KEY-MariaDB
gpgcheck=1
================================================
レポジトリとして使用可能になります。
[root@test ~]# yum repolist
リポジトリー ID リポジトリー名 状態
base/7/x86_64 CentOS-7 – Base 9,007
extras/7/x86_64 CentOS-7 – Extras 392
mariadb MariaDB 15
updates/7/x86_64 CentOS-7 – Updates 2,529
repolist: 11,943
早速MariaDBインストール。
yumが自動で足りないパッケージを引っ張ってきて入れてくれます。
[root@test ~]# yum install MariaDB-server MariaDB-Client
インストール中:
MariaDB-server x86_64 10.1.18-1.el7.centos mariadb 100 M
MariaDB-shared x86_64 10.1.18-1.el7.centos mariadb 1.3 M
mariadb-libs.x86_64 1:5.5.50-1.el7_2 を入れ替えます
依存性関連でのインストールをします:
MariaDB-client x86_64 10.1.18-1.el7.centos mariadb 39 M
MariaDB-common x86_64 10.1.18-1.el7.centos mariadb 43 k
boost-program-options x86_64 1.53.0-25.el7 base 155 k
galera x86_64 25.3.18-1.rhel7.el7.centos mariadb 7.8 M
jemalloc x86_64 3.6.0-1.el7 mariadb 104 k
perl-Compress-Raw-Bzip2 x86_64 2.061-3.el7 base 32 k
perl-Compress-Raw-Zlib x86_64 1:2.061-4.el7 base 57 k
perl-DBI x86_64 1.627-4.el7 base 802 k
perl-Data-Dumper x86_64 2.145-3.el7 base 47 k
perl-IO-Compress noarch 2.061-2.el7 base 260 k
perl-Net-Daemon noarch 0.48-5.el7 base 51 k
perl-PlRPC noarch 0.2020-14.el7 base 36 k[root@test ~]# mysql –version
mysql Ver 15.1 Distrib 10.1.18-MariaDB, for Linux (x86_64) using readline 5.1
conf設定します。
/etc/my.cnf.d/にファイルがあってファイルごとにセクションを分けて書いてるようです。
[root@test ~]# ll /etc/my.cnf.d/
合計 20
-rw-r–r– 1 root root 295 9月 30 04:06 client.cnf
-rw-r–r– 1 root root 763 9月 30 04:06 enable_encryption.preset
-rw-r–r– 1 root root 232 9月 30 04:06 mysql-clients.cnf
-rw-r–r– 1 root root 1080 9月 30 04:06 server.cnf
ファイル分けて書いてももいいですが、今回は/etc/my.cnfに全部書いちゃいます。
mysqlと設定はほぼ同じなのでmysqlの設定をそのまま記載しても動作します。
とりあえず基本的な設定を
[root@test ~]# vi /etc/my.cnf
=============================================
#
# This group is read both both by the client and the server
# use it for options that affect everything
#
[client-server]#
# include all files from the config directory
#
!includedir /etc/my.cnf.d[mysql]
default-character-set = utf8[mysqld]
datadir=/var/lib/mysql
socket=/var/lib/mysql/mysql.sock
character-set-server = utf8max_connections = 256
table_open_cache = 2000join_buffer_size = 128K
sort_buffer_size = 1M
read_buffer_size = 128K
read_rnd_buffer_size = 512Kinnodb_buffer_pool_size = 1G
innodb_log_buffer_size = 8M
innodb_additional_mem_pool_size = 8M
tmp_table_size = 16M
max_heap_table_size = 16Minnodb_log_file_size = 1G
innodb_log_files_in_group = 2=============================================
MariaDB起動
[root@test ~]# systemctl start mysqld
mysql_secure_installation投げて初期設定しましょう。
対話形式で設定してくれます。
[root@test ~]# mysql_secure_installation
Enter current password for root (enter for none): 現在のrootパスワード。初期パスなしなのでエンター
Set root password? [Y/n] rootパスワードを設定するか
New password: パスワード入力
Re-enter new password: パスワード再入力Remove anonymous users? [Y/n] アノニマス(匿名)ユーザーを消すか
Disallow root login remotely? [Y/n] rootのリモートログインを不許可にするか
Remove test database and access to it? [Y/n] testデータベースを削除するか
Reload privilege tables now? [Y/n] 権限の再読み込みをするか
あとはログイン確認して
ユーザーとかDBとか作ればOKです。
[root@test ~]# mysql -u root -p
MariaDB [(none)]> create database hoge;
Query OK, 1 row affected (0.00 sec)MariaDB [(none)]> GRANT ALL PRIVILEGES ON `hoge` . * TO ‘hoge’@’localhost’ IDENTIFIED BY ‘your-password’;
Query OK, 0 rows affected (0.00 sec)
今回はこんなところで。ではまた。